Create AI Member
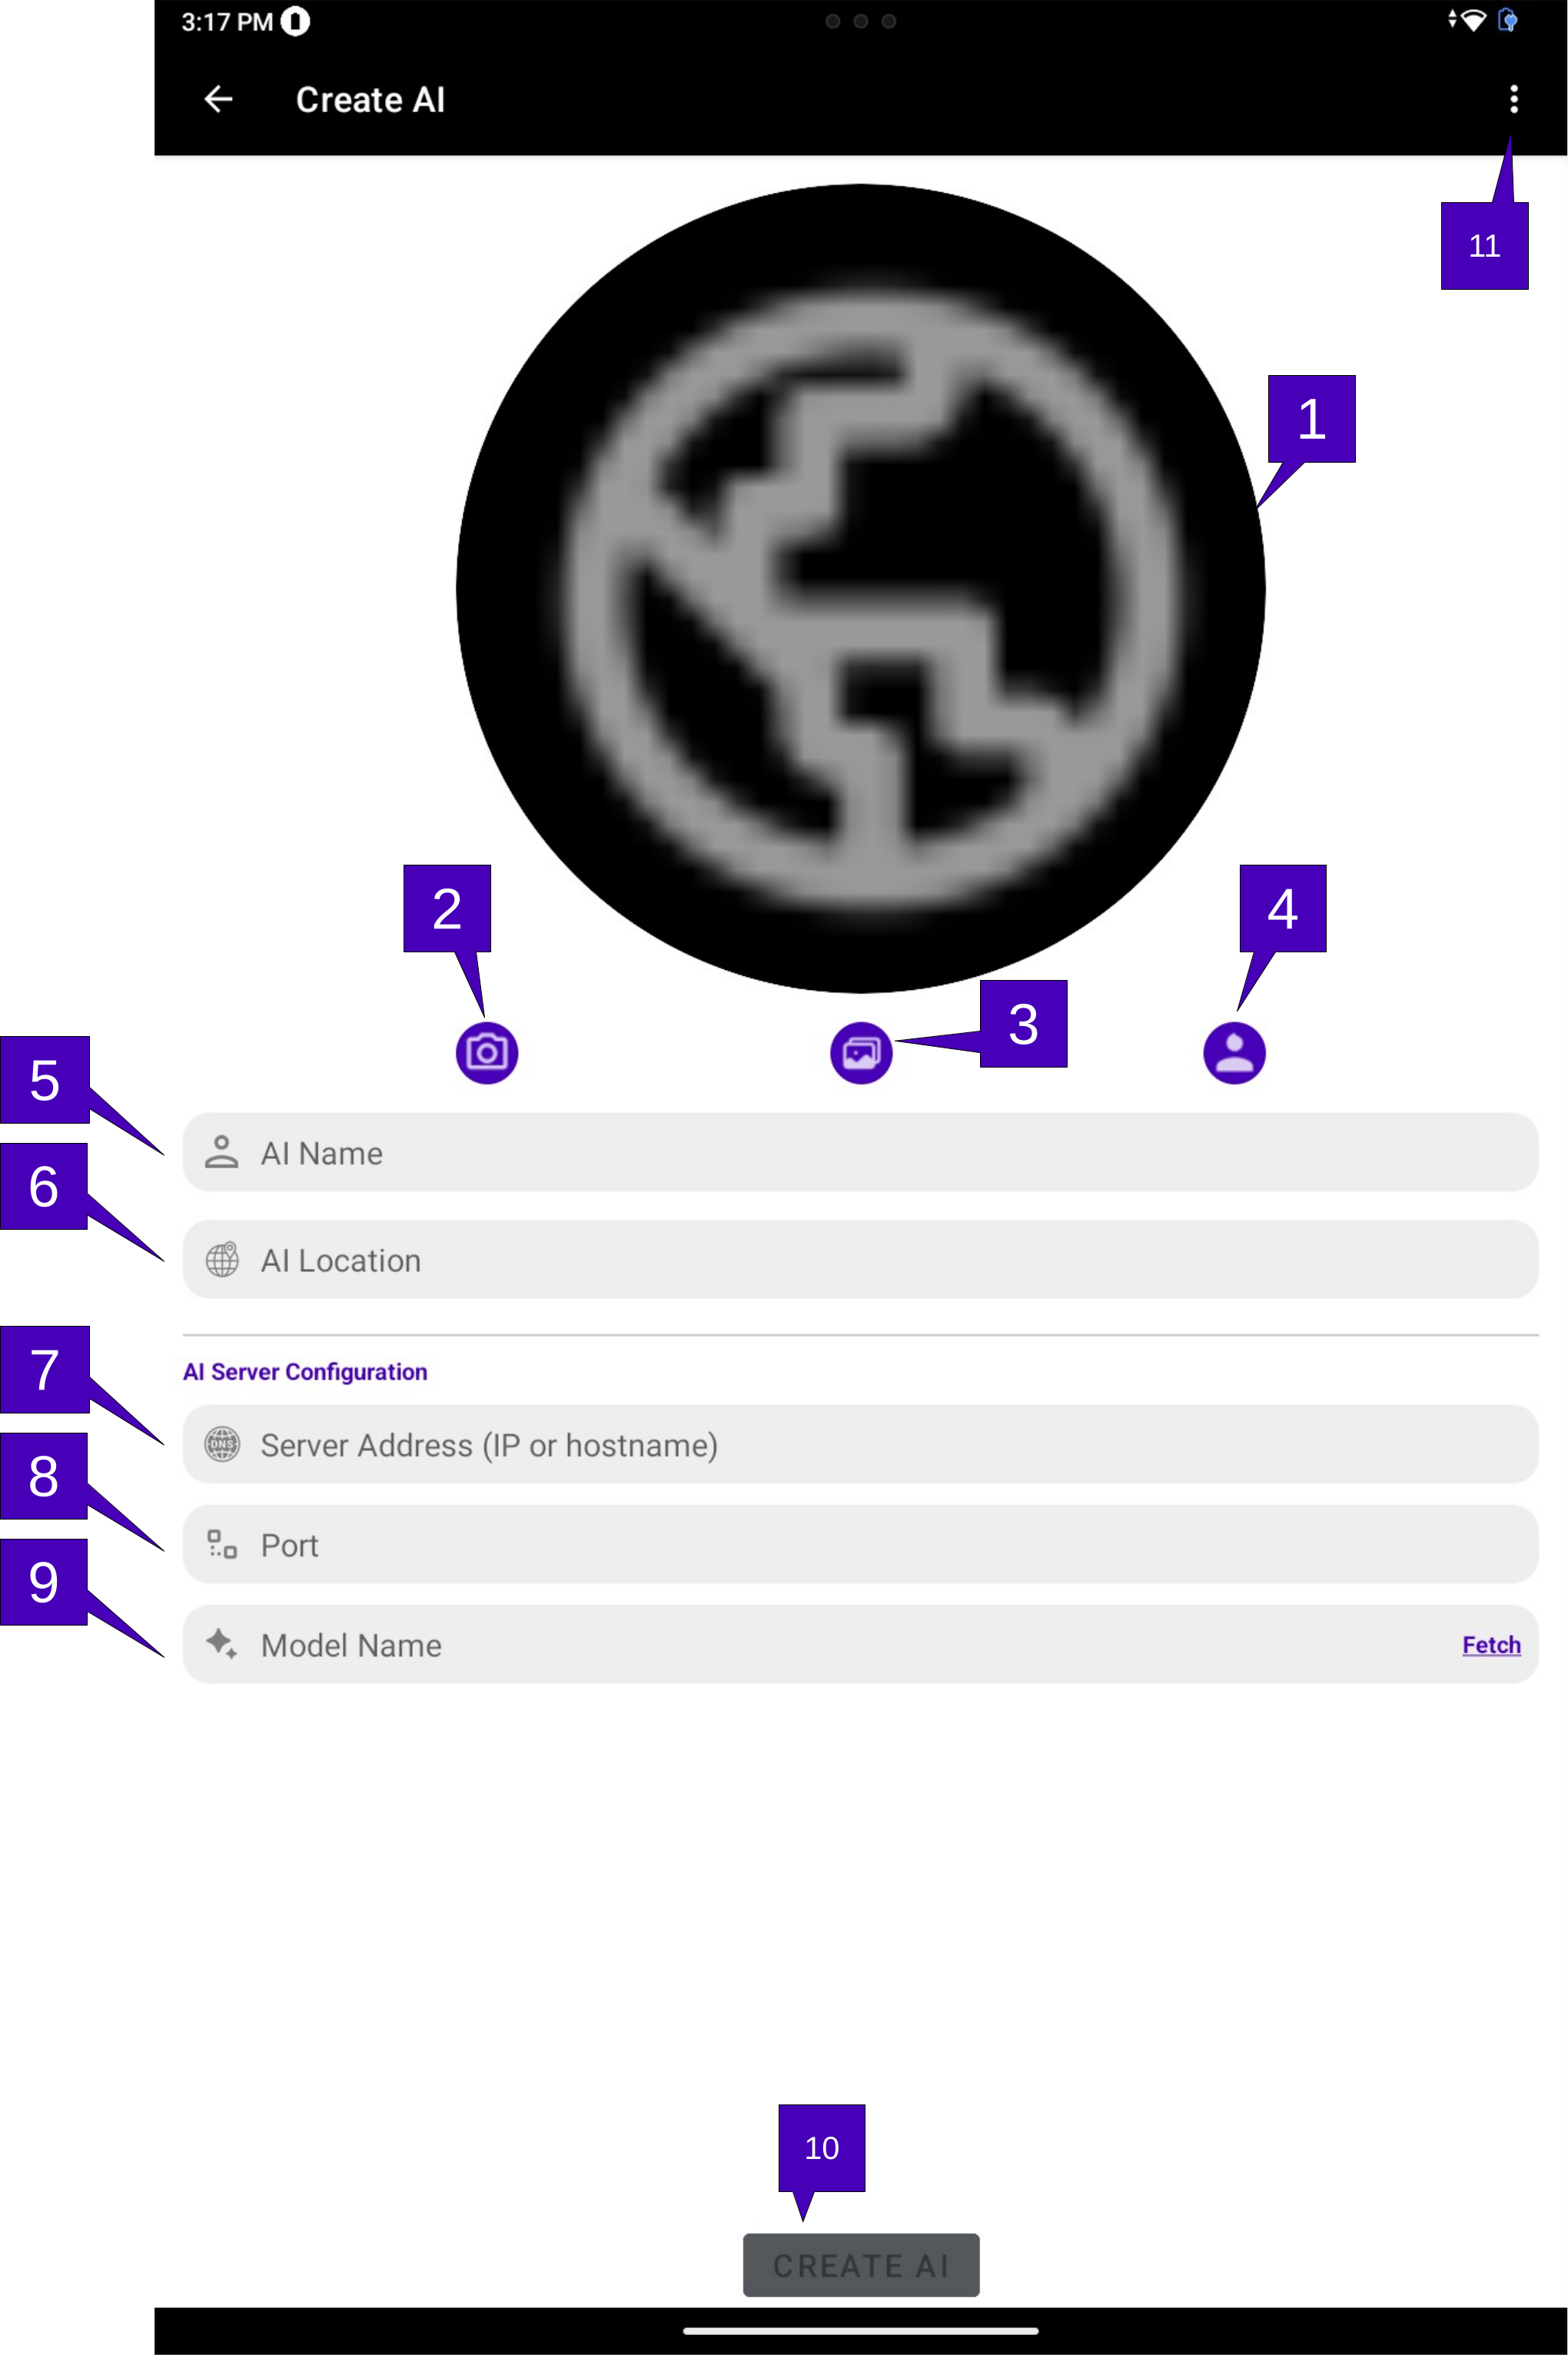
1. AI Image. The image or icon displayed to all world members for this AI member. If using an icon, a tap here will pull up the world profile section for customization.
2. Take Picture. A tap here will pull up the default Android camera application and by taking a picture, it will be used as the AI member image.
3. Select Image. A tap here will pull up the default Android image gallery application where an image may be selected as the AI member image.
4. Use Icon. A tap here will remove any image used as the AI member image and instead use an icon. This icon may be customized by a tap on the AI member image.
5. AI Name. Enter the name of the AI member here. This is how the AI member will be seen by all members. Note once an AI member name is selected, it cannot be changed.
6. AI Location. An optional field that indicates where the AI member is at. This can be a real place or fictional, and of course does not have to represent the device the AI member ‘resides’ on!
7. Server Address. The IP address or hostname for the AI server (i.e., the AI runtime).
8. Port. The port that the AI runtime (e.g., ollama) listens to.
9. Model Name. The model selected to run. Note that the available models are pulled by tapping the fetch button; there is not an option to enter a model manually. If no models are displayed in the overlay screen for selection, that indicates that the Server Address or Port is wrong, that the AI server is off-line, or that no models have been loaded on the AI server machine. In either case, an AI member cannot be created without a model. Once selected, the model cannot change for that AI member. If a different model is desired, another AI member can be created with that model.
10. Create AI. The AI Name and Model Name must have an entry for this button to be active.
11. Menu Overflow. Herein lies a menu for Help, which pulls up this page.
For information on AI server requirements, please see AI Server Setup Example.