Create Avatar

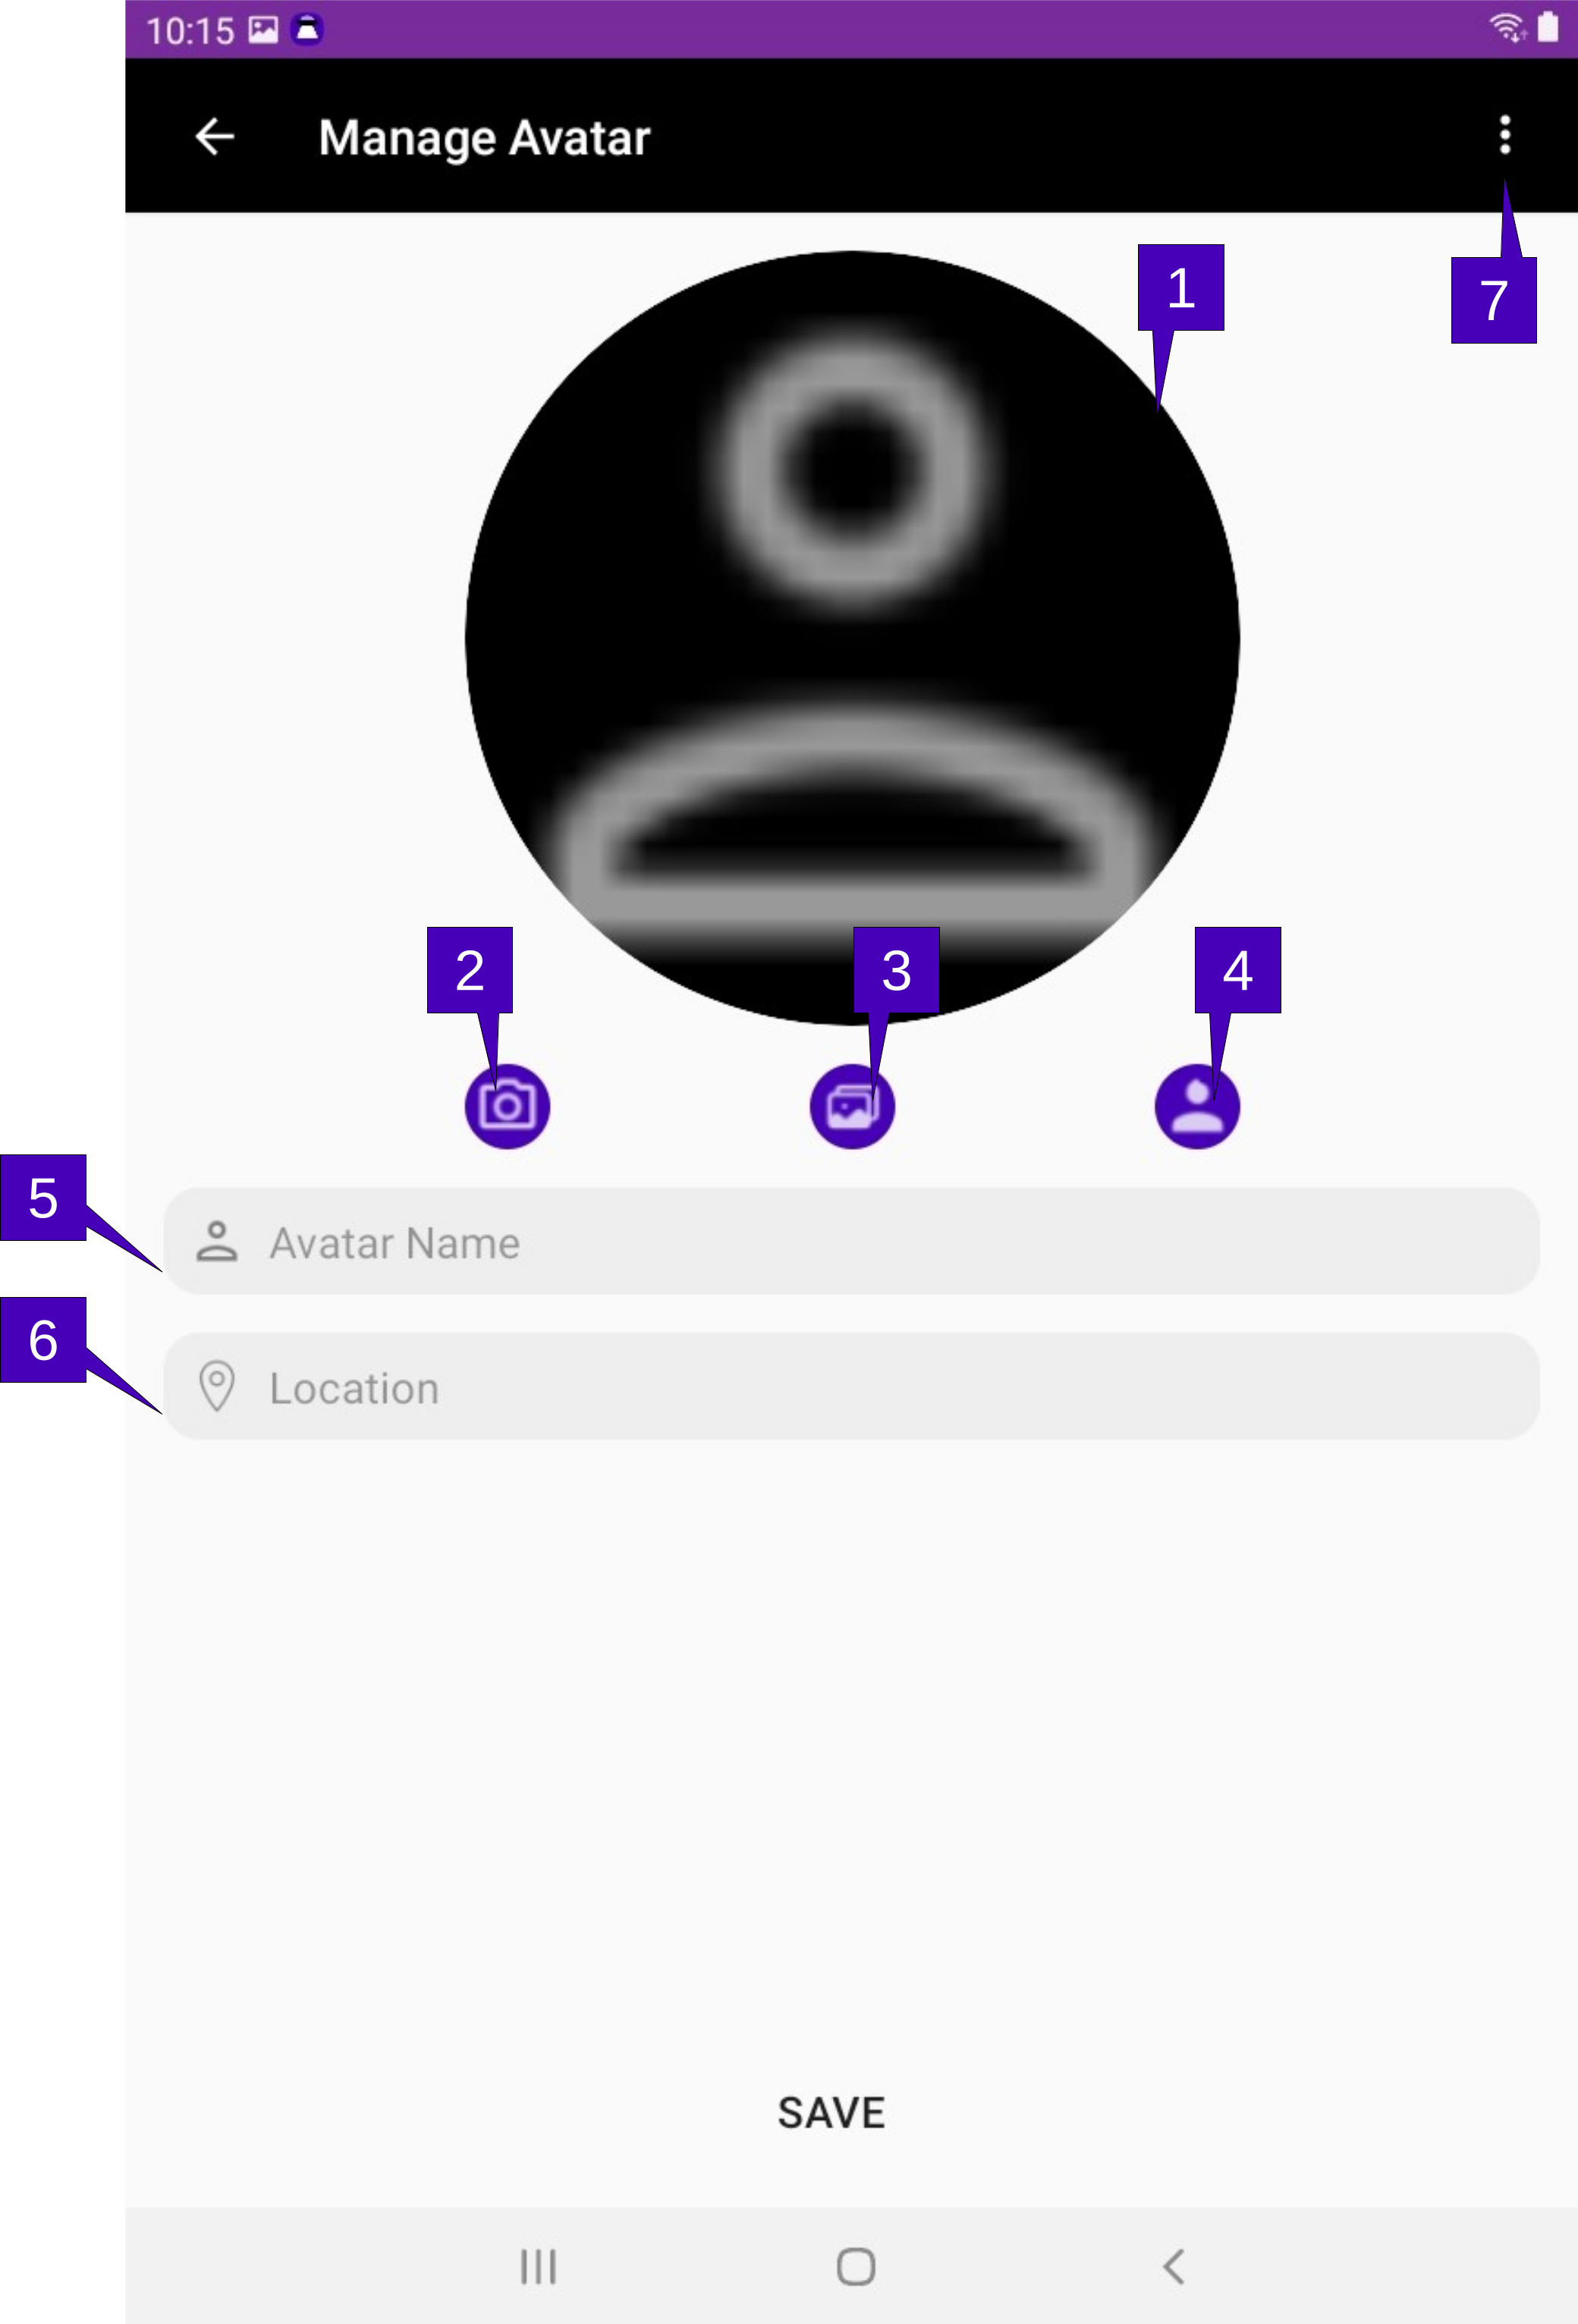
Note that there are two classes of avatar settings, a Default setting, which is created upon the first launch of GalixiCom and is used as the default avatar for any worlds joined, and a Member setting, which is the specific avatar characteristics of a specific world. When a world is first joined, the Default setting is used and if allowed on the hub (i.e., the avatar name is unique on the world), no action is required by the user if they do not wish to change their avatar settings. However, if a unique avatar is desired for that world, or if a unique name needs to be created (since the desired name already exists on the world), then this screen will be invoked and prompt the user to create a Member avatar for that world. The user may also create a unique Member avatar by tapping the World Profile menu option in Existing Chats screen.
1. Avatar Image. The image or icon displayed for this member. If using an icon, a tap here will pull up the Adjust Avatar screen for customization.
2. Take Picture. A tap here will pull up the default Android camera application and by taking a picture, it will be used as the avatar image.
3. Select Image. A tap here will pull up the default Android image gallery application where a image may be selected as the avatar image.
4. Use Icon. A tap here will remove any image used as the avatar image and instead use an icon. This icon may be customized by a tap on the avatar image.
5. Avatar Name. Enter the name to be used as the avatar here. This is how the member will be seen by all members. Note this must be a unique name on the world; if a name is chosen that already exists, the member will be asked to chose another.
6. Location. Enter the avatar’s base location here. This can be the actual location, or a fictional one, as it is a simple string and not used anywhere other than to provide some color for the member’s avatar.
6. Menu Overflow. Herein lie menu options for Help, which pulls up this page.