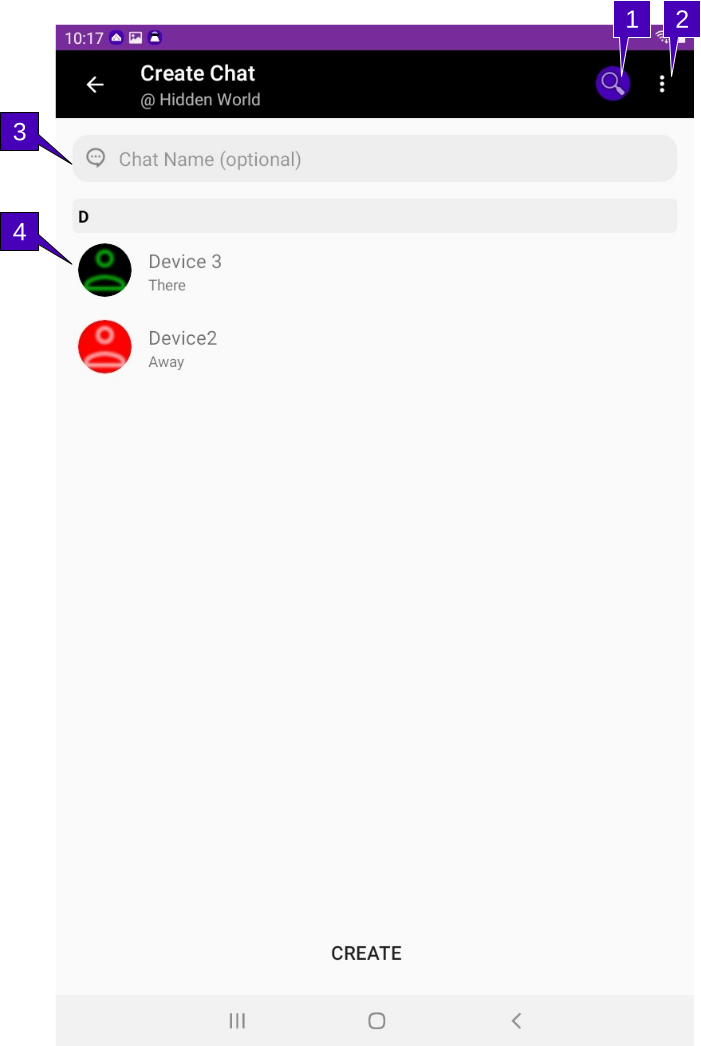
Create Chat

1. Search. A tap here will pull up a text-entry bar in the menu where the user may start to type the name of the avatar of the member desired to chat with. As letters are entered, the member list displayed will narrow to contain only the names of the letters entered.
2. Menu Overflow. Herein lie a menu for help, which opens up this page.
3. Chat Alias. An alias may be created to identify the chat. This is normally useful when creating a group chat. If an Alias is used, the chat will be identified with this alias. If not, the avatar name (or list of names if more than one person is in the chat) will be shown to identify the group chat.
4. Member List. A list of all the members on the network. The list will be shown in alphabetical order, with a separator bar for the groups of names with the same first letter. By default, all members are shown; to narrow the search, use the “Search” function above. Each member will have shown their profile image, their avatar name and their entered location. To select the member to chat with, simply tap the profile image. Selected members will be shown in green on the top of the list. To un-selected the member, tap it again. Any number of members may be selected to chat with. Pressing the “CREATE” button will create the chat, and jump the user to the Messaging screen.